Quick Start: Creating Your First Schedule
The following is a very simple introduction to the steps required to schedule an order for fabrication and delivery.
Prerequisite: Create (or have someone in your office create) sample orders associated with the same job. Note the order numbers or control codes. You will need them in steps below.
Schedule a Delivery
- Log into aSa.Studio.
- Open the Scheduling module: Click Menu
 > Order Processing > Scheduling.
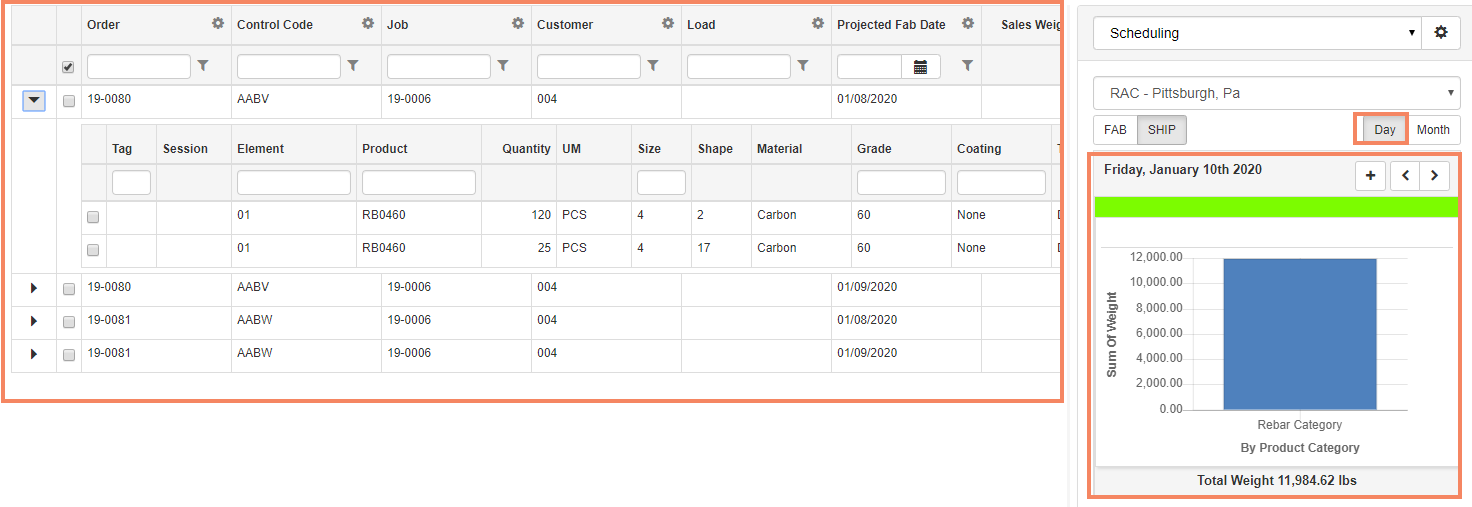
The Scheduling screen displays. - In the Right pane, be sure:
- Mode is set to Scheduling.
- Calendar view is set to SHIP and Month view.
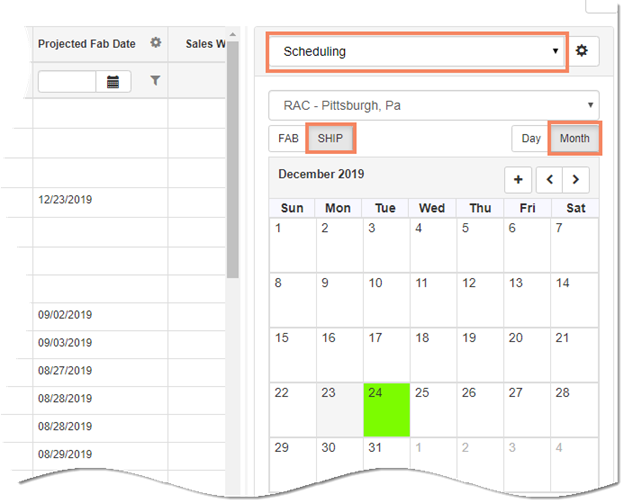
- In the Calendar grid, click the arrow in the first column to expand your two sample orders.
This shows a list of the items included on each order.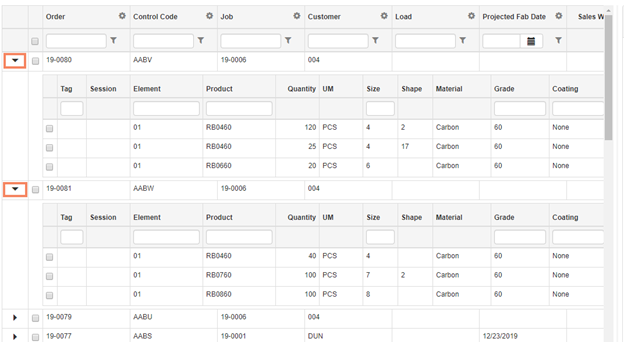
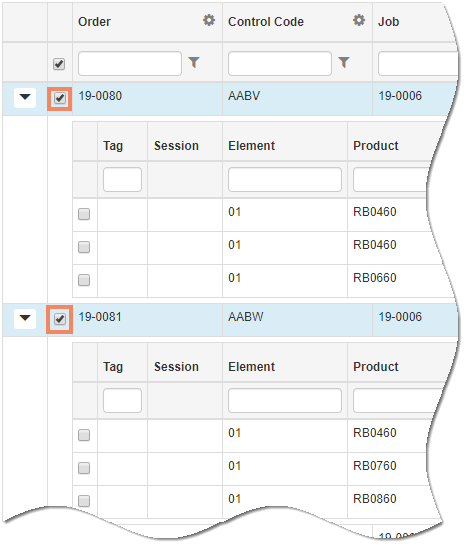
Note: You have the option to schedule individual items from an order independently, but in this simple scenario, we will schedule the entire order together. - Click the Select box at the order level to select your two sample orders.
- On the calendar, click the day you want to schedule the orders for shipment.
In the illustration, we have selected the ship date January 10.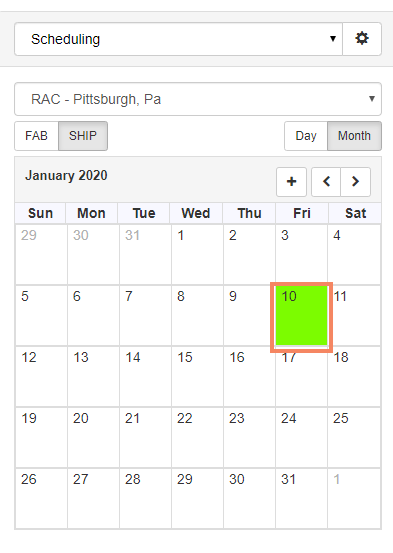
- Click again on the calendar day.
The screen updates:
- Calendar changes to Day view - includes a bar chart with scheduled weight for the day.
- The grid filters to show only the items scheduled for that day's delivery. Click to expand an order and view its details.
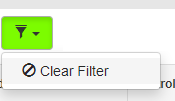
HINT: To re-display all items in the grid, click Filter > Clear Filter.
Schedule Fabrication
Based on options defined for your operation, the system may automatically schedule fabrication based on your delivery. For example, items may be scheduled for fabrication two or three days prior to the delivery date you just set. Straight items, bent items, and non-rebar items may all have different lead times between fabrication and delivery.
Use the procedure to below to change fabrication dates or to assign fabrication dates if they aren't assigned automatically.
To schedule fabrication:
- In the Right pane, be sure:
- Mode is set to Scheduling.
- Calendar view is set to FAB and Month view.
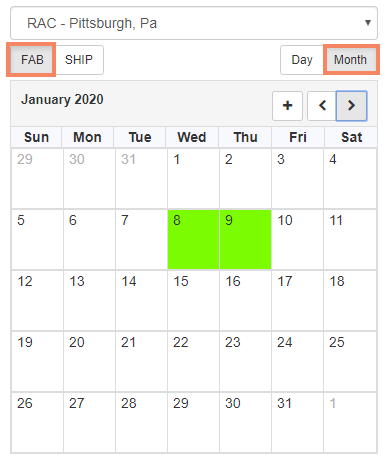
- In the Calendar grid, click the arrow in the first column to expand the orders.
This shows a list of the items included on each order.
Notes:
- Any item that has been previously scheduled (either automatically or manually) will have a date in the Projected Fab Date column.
- In the grid, a separate row displays for each order scheduled for a specific day. For example, if you have different lead times for straight vs. bent bars, the order row will appear twice, once as a header for the straight bars and once as a header for the bent bars.
- Select items to schedule:
- To schedule all items listed under an order, click Select on the order line.
- To schedule individual items, click Select on the respective material lines.
Note: You cannot select order rows and individual line rows in the same transaction.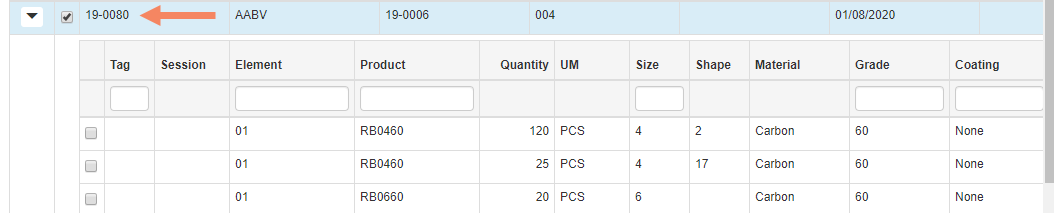
or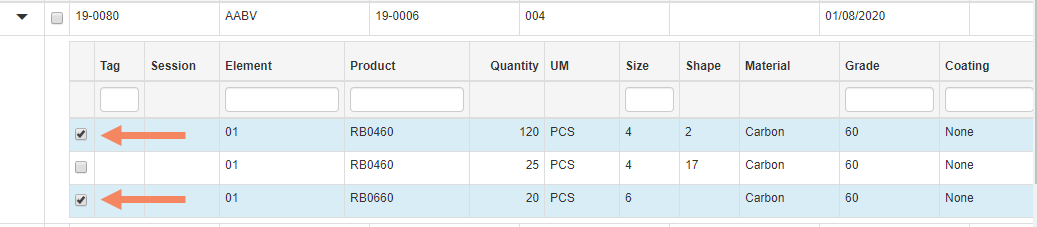
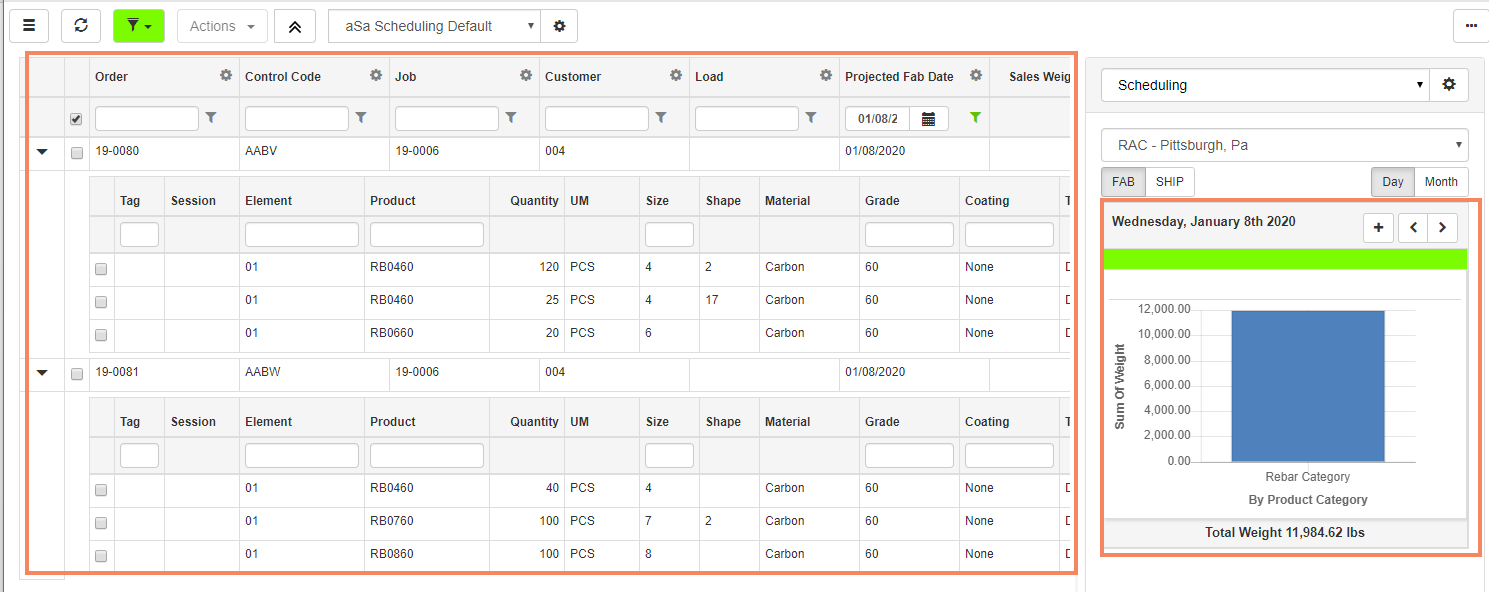
- On the calendar, click the day you want to schedule the items for shipment.
In the illustration, we have selected the fabrication date January 8.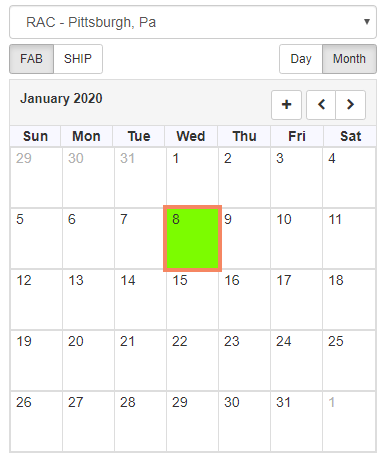
- Click again on the calendar day.
The screen updates:
- Calendar changes to Day view - includes a bar chart with scheduled weight for the day.
- The grid filters to show only the items scheduled for that day's fabrication. Click to expand an order and view its details.
- If prompted, select Yes to update existing dates.
HINT: To re-display all items in the grid, click Filter > Clear Filter.
Plan Delivery Details
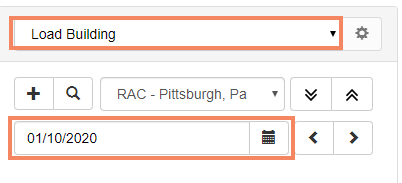
- In the Right pane:
- Select Load Building.
- Select the Date you want to ship material. Use the delivery date that you scheduled above.
- Click Add
 to start a new load.
The Load Details screen displays.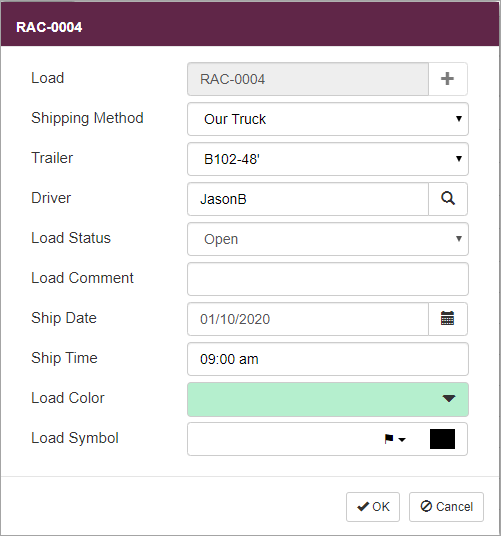
- Complete the Load Details screen:
- Load - Click + to assign a Load ID.
- Shipping Method - Select the method you will use to ship the material.
- Driver - Select the delivery driver.
- Load Status - Leave this as the default: Open
- Load Comment - If desired enter a note to associate with the load.
- Ship Date - The date you selected displays.
- Ship Time - If desired, select the time of the delivery.
- Load Color and Load Symbol - If desired, select a color and symbol that will help you to easily identify the load. Load color and symbol display on the Load Calendar.
- Click OK.
The load displays in the Right pane. If you have other loads started for the same day, they will also display in the Right pane. - In the grid, click to select both of the orders that you scheduled earlier.
- In the Right pane, click the Load ID button.
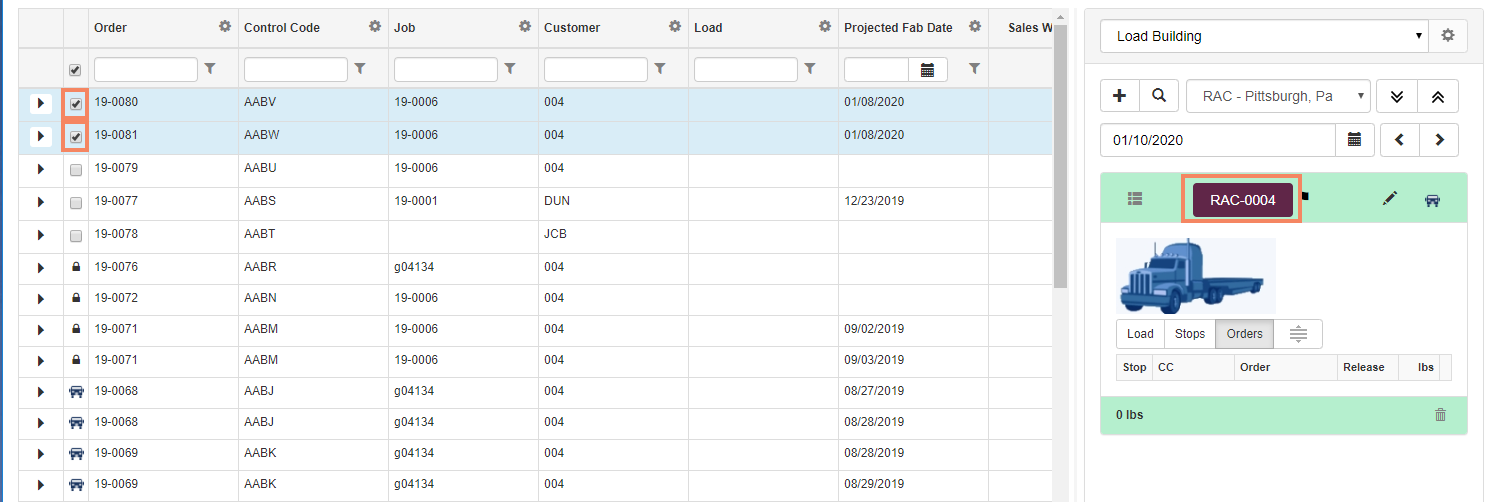
The orders are assigned to the load.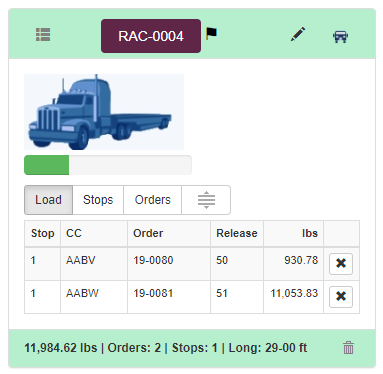
Note: Because both orders are for the same job, one delivery stop is automatically created. If you have multiple jobs on a delivery, a stop is created for each job. You can then re-sequence the stops as needed.
Additionally, you can automatically create a printed shipping ticket for each stop on the load if you meet both of the following conditions:
- You are licensed for aSa Shipping Ticket.
- You have printed tags for all the items to be shipped.
- If you meet both of the conditions above, click the Shipping Ticket button to automatically generate Shipping Ticket document(s). One ticket is created for each stop.
