Quick Start: Creating Your First Order
The following is a very basic overview of the general steps you will perform to create an order and print the report.
The procedure outlined below assumes that you or an administrator have already completed all setup tasks and that you have at least one job, customer, and contact defined in the system.
To create your first order:
-- Get started --
- Log into aSa.Studio.
- Open the Order Entry module: Click Menu
 > Order Processing > Order Entry.
The Order Entry > Main screen displays. - Complete the Main screen using the following as a guide:
- Control Code - Click + to automatically assign a Control Code.
- Order - If the order number does not populate automatically, click + to assign an order number.
- Job Name - Select the job that is associated with the order. Customer automatically displays based on the selected job.
- Release - Click + to assign the next release number in sequence.
- Description - Enter a description for the order.
Other fields are either optional or automatically completed based on default values set up for your organization.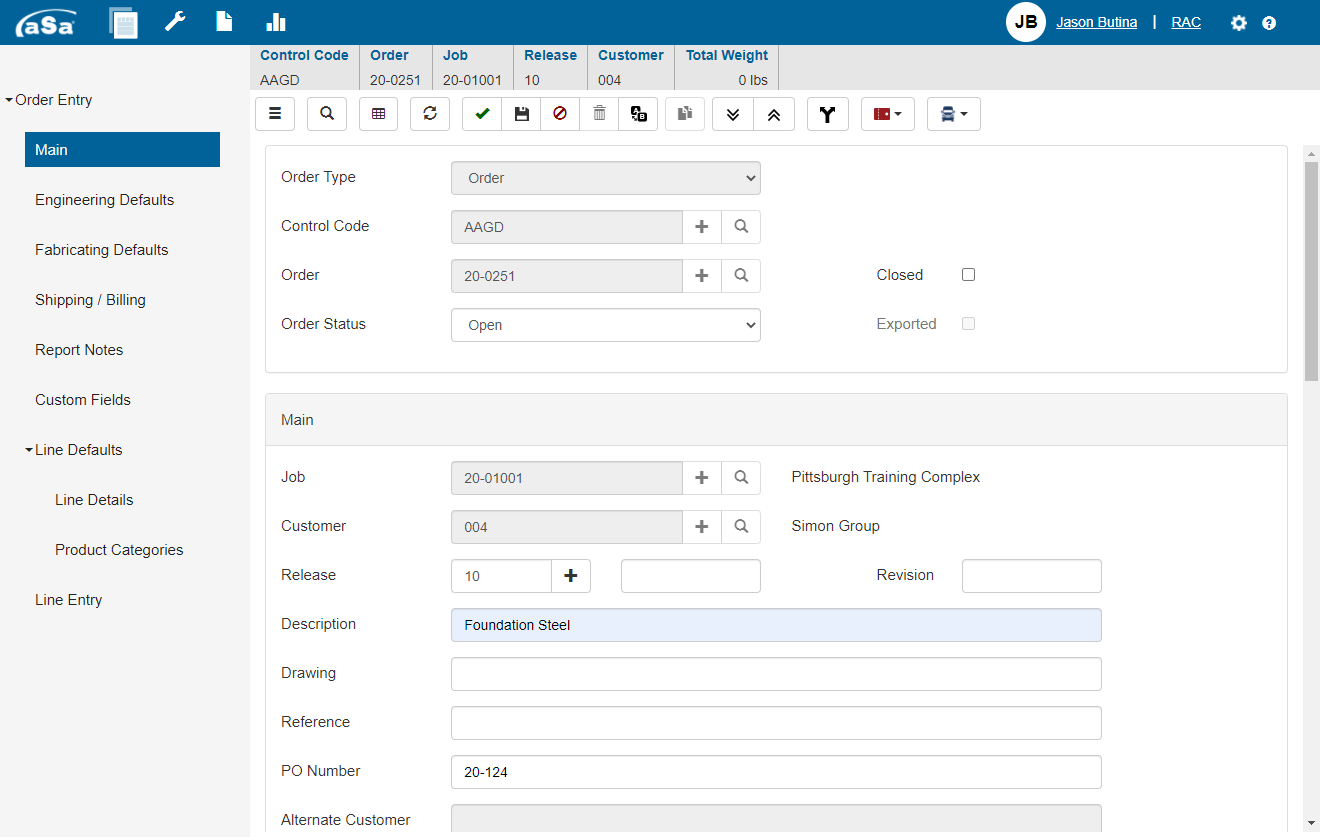
- Click Takeoff
 to display the Line Entry screen.
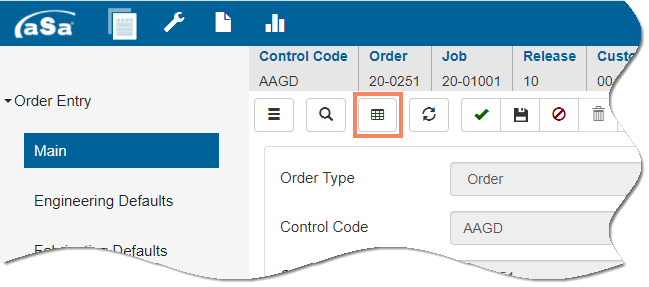
Line Entry is the main screen where you will enter material.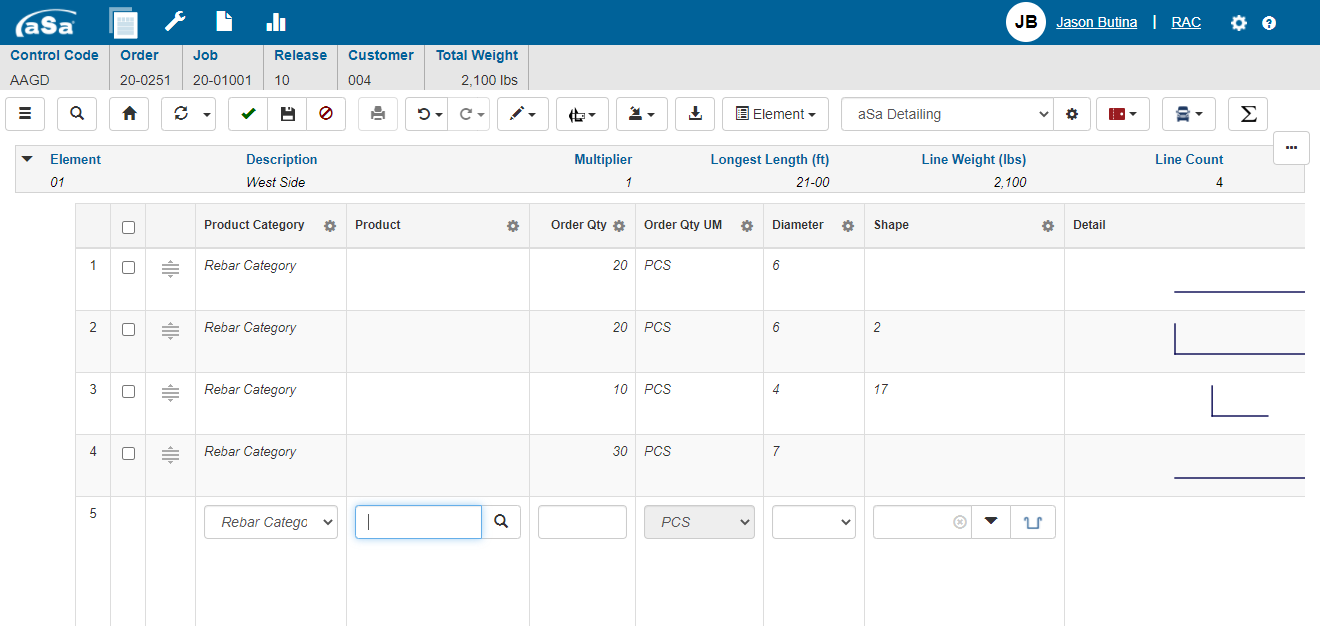
-- Enter order details --
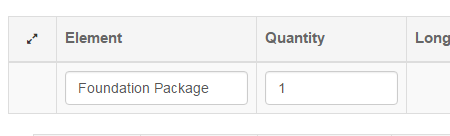
Orders can be organized into groupings called Elements. If Element is not hidden based on your field entry scheme, the first element automatically displays at the top of the entry area. - If desired, enter a name for the element.
Hints:
- If you add a quantity to an element, all takeoff lines that follow are automatically multiplied by that quantity.
- You can add additional elements at any point if you wish. If you don't want additional groupings, just list all your material under the first default element.
 - Expand or collapse an element.
 - Expand or collapse all elements.
- Use the grid to enter your bar details.
- For fabricated items, such as cut and/or bent rebar, skip the Product field and complete the remaining required fields. The system will automatically associate a product based on the details that you enter.
- For miscellaneous items and off-the-shelf stock lengths of rebar, select the desired product in the Product field.
Hints:
- Press Tab or Enter to advance your cursor through fields or shape dimensions.
- When the cursor is active on the Finish
 button, press Enter to complete the entire line.
 - When entering shape dimensions, use + to have the program automatically insert a standard or calculated dimension.
- Click Save
 to save your work.
 - Click Print
 .
.
The report generates and your browser's print screen displays.
-- Optional: Process and create tags --
Based on your needs and business practices, you can create tags for the order immediately or at any point in the future. - If desired, click Processing
 , then select:
- Print Tags - Immediately generate and print tags.
- Process Order - Create tags and processing reports, then print as needed from the Processing module.
- Launch Processing - Open the Processing module, where you can process and create tags for your orders.