Saving and Re-Using Display Settings
After customizing the grid, paging, and calendar options, you can easily save your settings and use them again for future Scheduling sessions. A group of settings saved with a name is called a scheme.
To open an existing scheme:
- Click the Scheme Settings button
 .
. - Click Open from the dropdown.
To apply a scheme:
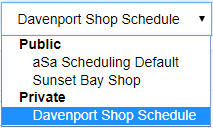
- Click in the Scheme field
 , then select the desired scheme.

To save display settings for the current scheme:
- Customize your display settings as described in Working with the Scheduling Grid and Working with the Scheduling Calendar.
- Click the Scheme Settings button
 .
. - Click Save from the dropdown. If your current scheme has a name, it will be updated with any changes you made. If your current scheme has not yet been saved with a name, you will be prompted to enter one.
To save display settings as a new scheme:
- Customize your display settings as described in Working with the Scheduling Grid and Working with the Scheduling Calendar.
- Click the Scheme Settings button
 .
. - Click Save As from the dropdown. This is helpful is you want to start with an existing scheme, then modify it without overwriting the original.
- Enter a scheme name in the Target Settings field.
- Click OK.
To set a scheme as your default:
- Save or apply a scheme as described above.
- Click the Scheme Settings button
 and select Open.
The Customize Main screen displays.
- Click Set as Default.
- Click Finish
 .
.
Any time you open the screen in the future, the default scheme is automatically applied. You always have the option to select a different scheme if desired.
To make a scheme public:
- Save or apply a scheme as described above.
- Click the Scheme Settings button
 and select Open.
The Customize Main screen displays. - Check Public
 .
. - Click Finish
 .
.
To delete a setting:
- Open the setting as described above.
- Click Delete
 .
. - At the prompt, click OK.
