Trailers Editor
When you create loading sequences for shipments in Scheduling, you select a carrier and trailer. Trailers are also used to validate loading in aSa's Load Tracking module. Use the Trailers editor to view and define trailers for each fabricating location.
Setting Up Trailers
To set up trailers information:
- From Common > Environment > General >Trailers.
The Trailers editor displays.
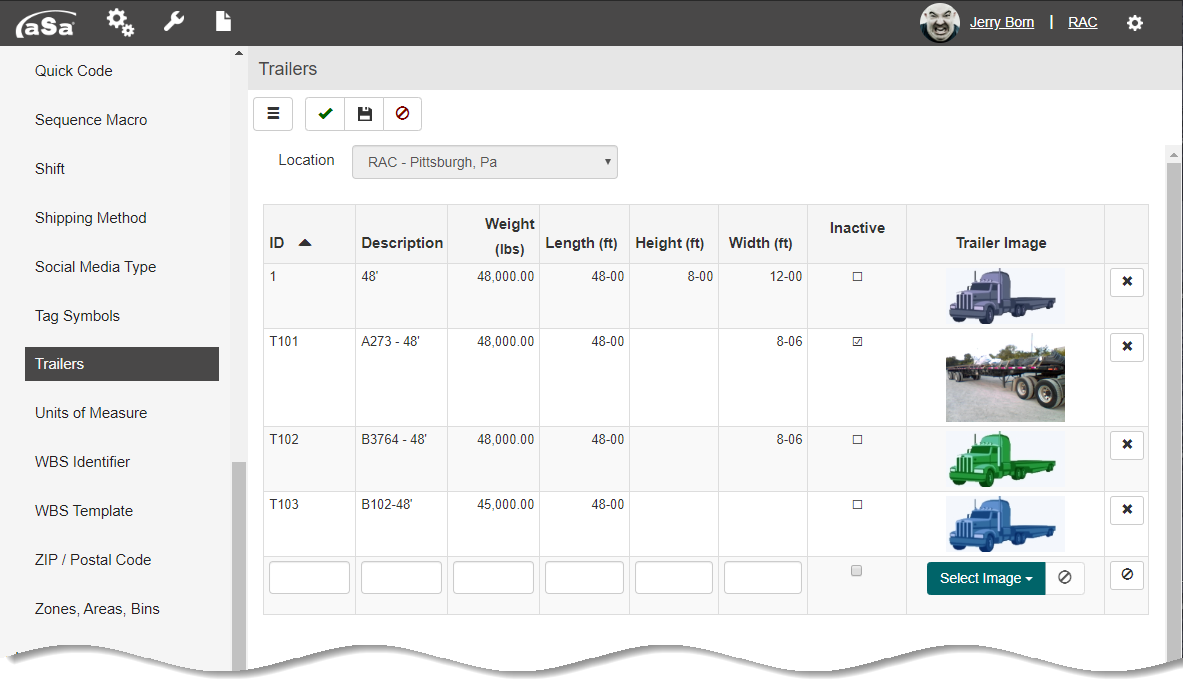
- Select the fabricating location from the dropdown list for which you want to set up trailers.
- In the grid, enter the following for each trailer:
- ID - Unique identifier for the trailer.
- Description - Text description of the trailer.
- Weight - Maximum weight permitted on the trailer.
- Length - Maximum length permitted on the trailer.
- Height - Maximum height permitted on the trailer.
- Width - Maximum width permitted on the trailer.
- Inactive - Check if the trailer is inactive.
- Trailer Image - Select a default trailer image or browse to a photo or image.
 Clear Line Entry - Clears details in the line before saving.
 Delete Line Entry - Deletes the trailer information in the line
- Assign a picture to each trailer.
- Click Select Image.
- Select Browse, Catalog, or Default Image and choose the trailer image you want to use.
- Click OK.
- Click Finish
 .
.
To remove a trailer:
If you need to completely remove a trailer follow these steps; otherwise, set it as inactive if it is unavailable.
- Click the Delete Line Entry button for the trailer to be removed.