Leg Properties
After using the Wizard to assign letters to each leg and witness line, you can use the Leg Properties to:
- Re-assign the leg's dimension letter
- Set up general, entry, and display characteristics for the leg
To define properties for a leg or dimension:
- Be sure Leg Properties is selected in the Properties dropdown field.
- On the Drawing Canvas, click on the desired leg.
- Set up property fields for the selected leg.
Leg Name
View or change the name of the leg.
General
General options affect how the shape's leg is handled in order entry, reports, and any other place the shape appears in the system.
Display Leg Name
Check to display the leg name — the letter or dimension that appears next to the picture — or uncheck to hide it.
Required
Check if the leg is required for the shape to be complete. Uncheck if the leg is optional.
Critical
Check to indicate that the leg's dimension is critical. Most legs can be adjusted within industry standard tolerance, but critical or "hold" dimensions must be held to the specified dimension. Critical dimensions are highlighted on bundle tags.
Run Out
Check to indicate that the leg is a "run out" leg. Run out legs are used on certain building codes, including BSI. When used, you enter a theoretical length and one or more legs lengths. You then skip the run out leg, and the program automatically calculates that dimension for you.
Horizontal Dimension Alignment
Indicate how the displayed dimension will be oriented relative to the leg when the shape appears on screens, reports, and tags. In general, you want to align the dimension so that longer values print to the outside the corresponding leg, and not on top of it.
Valid entries: Left, Center, Right.
Vertical Dimension Alignment
Indicate how the displayed dimension will be oriented relative to the leg when the shape appears on screens, reports, and tags. In general, you want to align the dimension so that longer values print to the outside the corresponding leg, and not on top of it.
Valid entries: Top, Middle, Bottom.
|
|
Example 1 |
|
Example 2 |
|
Correct alignment |
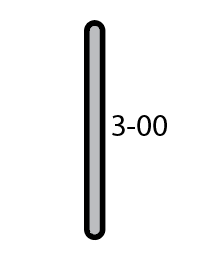
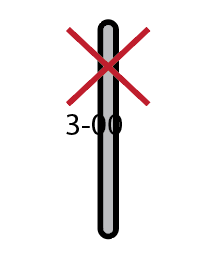
Place dimension to right of leg Vertical align: left (value grows to the right from origin)
|
|
Place dimension above leg Horizontal align: bottom (value sits on top of origin point)
|
|
Incorrect Alignment |
Place dimension to right of leg Vertical align right (value grows to the left from origin)
|
|
Place dimension above leg Horizontal align: top (value sit underneath origin point)
|
Order Entry
Indicate how the dimension is handled in the Order Entry Screen:
Display Leg on Entry
Check to display the leg in Order Entry; uncheck to hide the leg entirely from the shape picture.
Enable Name/Dimension on Entry
Check to permit a dimension entry for the leg name. Uncheck to display the dimension as view-only/disabled.
Stop Cursor on Entry
Check to have the cursor stop in the dimension field during the order entry process. Uncheck to skip over the field; if unchecked, you can still click in the field to change the value if it is enabled.
Note: Typically, you would only disable the dimension name or have the cursor skip over the dimension field if the dimension is automatically calculated by the program.
Reporting / Tagging
Display Leg On Reports
Check to display the leg dimension on tags and reports that reference the shape. Uncheck to hide the leg dimension.
- If the segment is a leg, the leg itself will display as part of the shape; just the associated dimension is hidden.
- If the segment is a witness line, both the witness line and the associated dimension are hidden.


