Setting up Custom Fields
Custom fields are special fields that you define for any purpose that serves your needs.
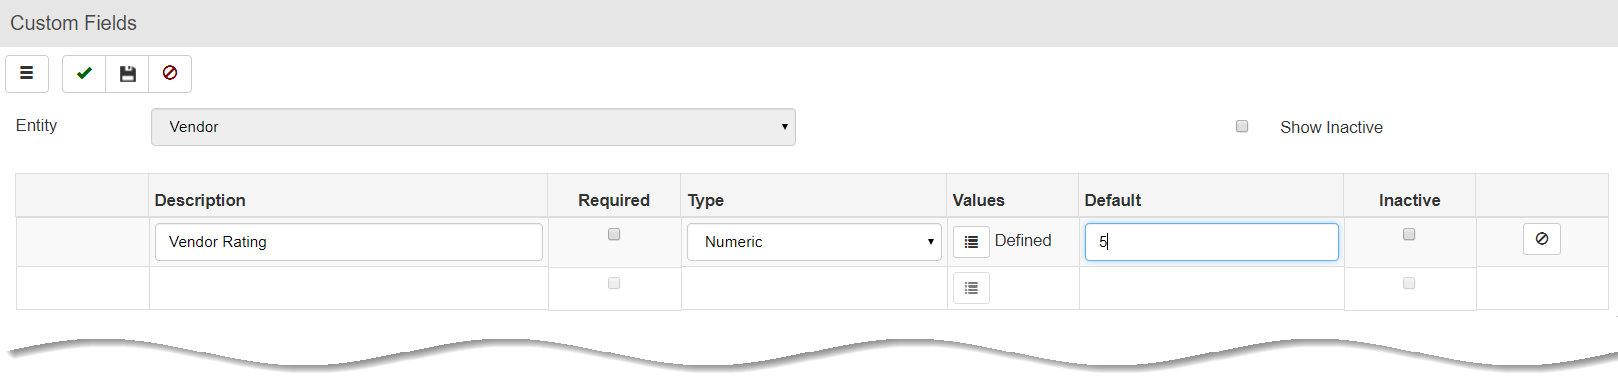
To set up a custom field:
- In the Environment module, select General > Custom Fields.
- Select an Entity where the custom field will be added.
- Customer
- Job
- Location
- Order entry
- Order Line Item
- Person
- Product
- Vendor
- Enter a field name in the Description column.
- Check the Required checkbox if the custom field is required.
- Select the type of entry.
- Alphanumeric - Letters and numbers
- Check Box - a check box
- Currency - currency to be used.
- Date - select a specific date
- List - add a list of options for the user to select
- Numeric - numbers only
- Click Values
 and adjust settings if needed based on the Type selected:
- For List fields, enter the valid options to populate the dropdown list.
- For Numeric fields, set up Decimal Places, and Minimum, and Maximum Values.
- If desired, enter a default entry for the field in the Default field.
- Click Save
 .
.
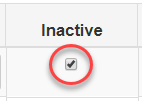
To set a field as inactive:
If you have defined a field entry that you no longer want to display, but don't want to delete it, you can set the field as Inactive.
- Select the correct Entity for the field.
- Locate the field description.
- Check the Inactive box for the field.
Note: Click Show Inactive ![]() to display fields marked as inactive.
to display fields marked as inactive.
To change the order in which custom fields appear on their entity screen:
- Select the correct Entity for the field.
- Click and draft the Position
 button to move the line to its new position.