Creating Stock Products from Rolled Coil
Use the following process to
- create pre-cut steel plates to stock in inventory and supply on future orders.
- create smaller coils from the manufacturer-supplied larger coil.
If you are fabricating steel plates based on customer specifications, refer to Fabricating Steel Plates instead.
Overview
- Use Order Entry to create a work order to produce stock items.
- Use Processing to generate stock tags and produce new stock items from the source product.
- Tracking - Activate stock tags as new items are produced.
Prerequisite
Before you begin, be sure you have defined the parent product (coil) and sub-products (pre-cut lengths) as described in the previous section.
Order Entry - Create work order
To create stock items from rolled coil:
- Open the Order Entry module.
- In the Order Type field, select Work Order.
- Assign a Control Code and Order Number, and enter a Description.
HINT: Refer to the Order Entry documentation for detailed information on using this module. - Click Line Entry.
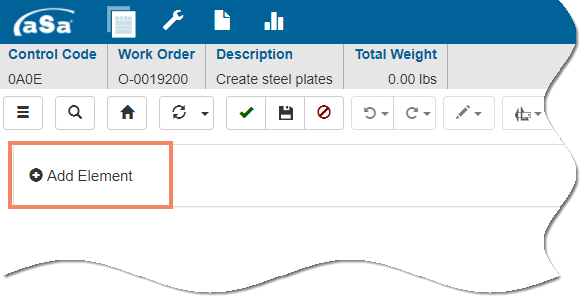
- Click Add Element.

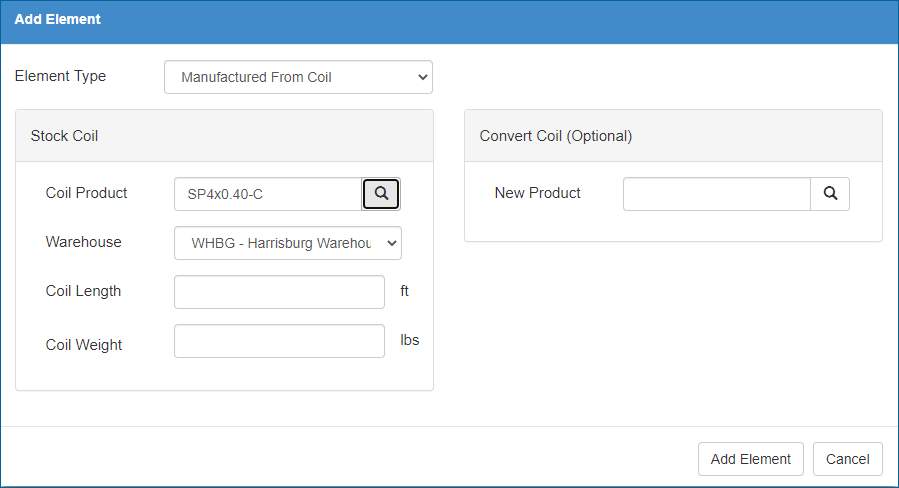
The Add Element window displays.
- Complete the Add Element window using the following as a guide.
- Coil Product
Select the rolled coil item you are creating stock items from (the parent product). - Warehouse
Verify or select the warehouse associated with the source product. - Coil Length
Enter the length of the source coil you are manufacturing from. Leave blank to auto-calculate length based on the supplied weight. - Coil Weight
Enter the weight of the source coil you are manufacturing from. Leave blank to auto-calculate weight based on the supplied length.
HINTS:
- Specify length and/or weight to have the program validate against entering more sub-products than you have source material to produce.
- Leave length and weight both blank to indicate unlimited source product.
- Convert Coil (Optional)
If you are creating only one stock product from the entire source coil, select the product in the New Product field. If you are creating multiple products, such as different lengths of steel plate, leave New Product blank.
- Click Add Element.
In the grid, the element header represents the source product. The line items underneath represent the new stock products you are going to create. If you completed the New Product field, the new product automatically displays in the grid. - Under the element, use the Product field to select the new stock product you want to create (either cut to length steel plate or smaller coil).

- If desired, add additional new stock products. For example, if you want to create 2-00 and 4-00 plates, each would be a line in the Order Entry grid.
- If desired, repeat the steps above to add additional coil to stock products to the work order.
- Click Finish
 .
.
Processing - Produce new stock items
To produce new stock items:
- Open the Processing module and start a new session (or continue with an existing session).
HINT: Refer to the Processing documentation for detailed information on using this module. - On the Main screen Control Code grid, select the work order that contains the new stock items to produce.
- Click Material.
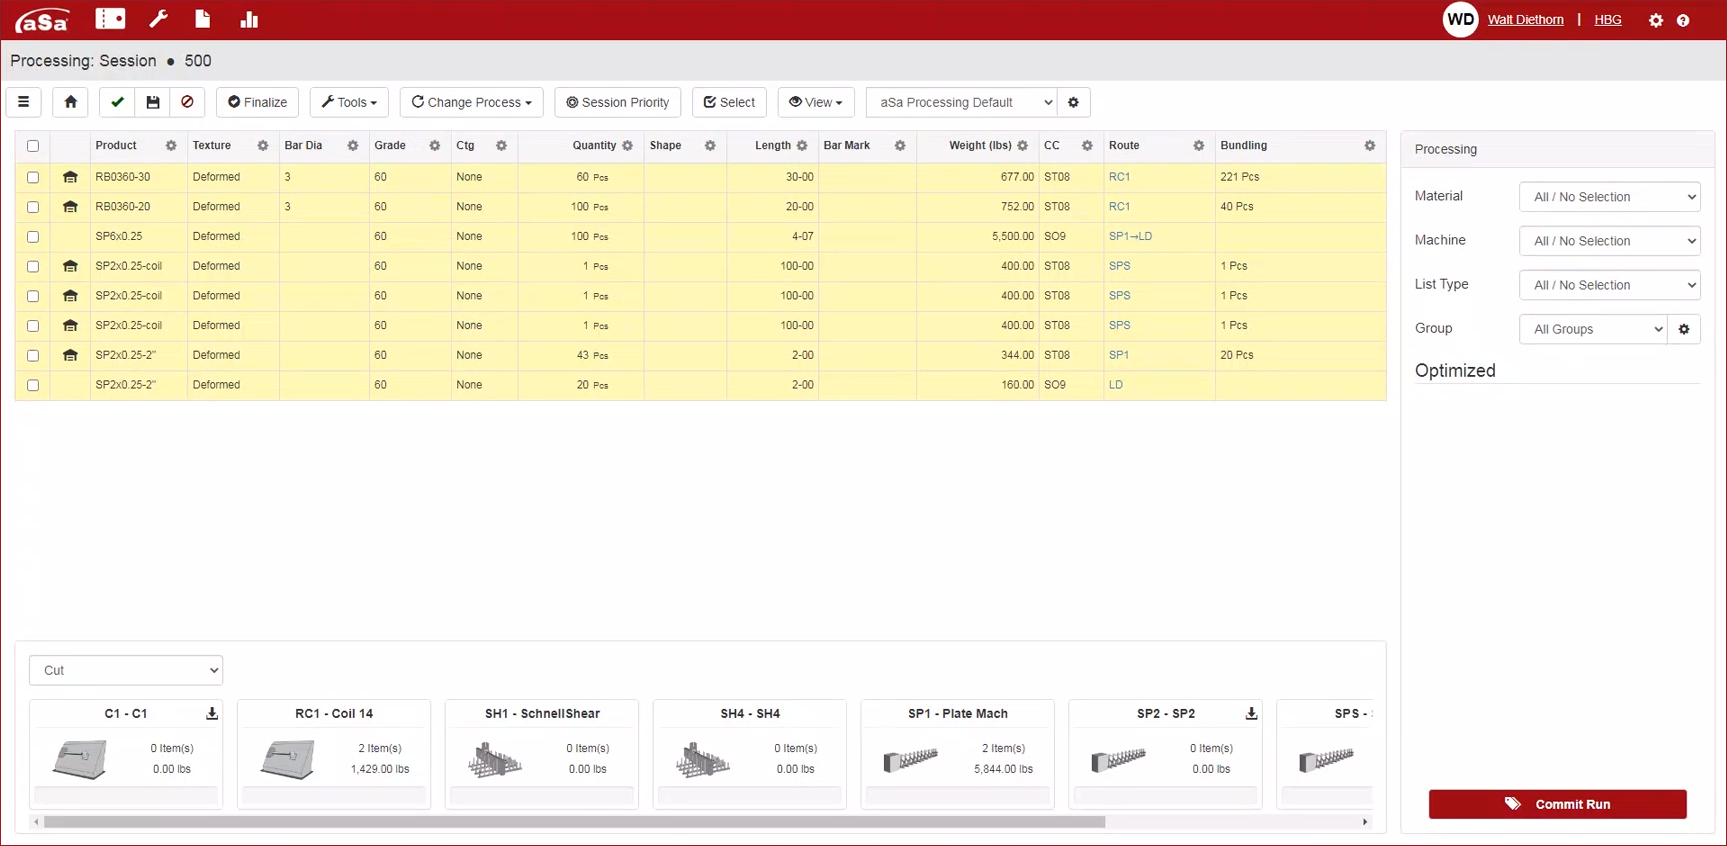
In the grid, stock items (as opposed to items fabricated for a specific customer) are preceded by the Stock icon.
icon. 
HINTS:
- You may include multiple regular orders and work orders on a single processing session if desired.
- If desired, assign new routes to the rolled coil / steel plate items as described in the Processing documentation.
- When you are finished fine-tuning the processing run, click Commit Run and print tags.
Stock tags -- not item bundle tags -- are created for the new stock items. The tags have a status of pending until they are activated at a machine as described below.
Tracking - Activate tags
To produce new stock items:
- Scan the source coil material's stock tag.
This records the coil bundle as open and associates heat information to the new stock items being produced from that coil. - Cut the coil item to produce steel plates (the new stock items).
- Attach Processing-generated stock tags to the new coil plate products.
- Scan each tag as you tie it onto the inventory bundle.
Scanning the tag:
- Activates the stock tag.
- Adds the item to inventory.
- Associates heat information from the source material to the new stock item.
- Marks the item as complete on the work order.
