Working with Elements
Before you begin entering material, you should understand the concept of elements.
Overview
Use elements to group material within your order. Each element is a collapsible heading that contains line items.
- Elements can be set up for any purpose that suits your needs. For example, you could use elements to identify structure types (such as foundations, walls, and columns) concrete pours, or trailer loading sequence.
- The following information displays for each element:
- ID
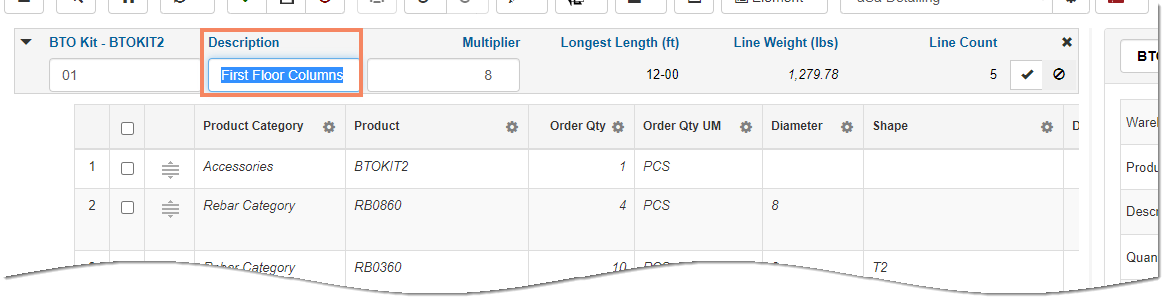
- Description
- Multiplier
- Longest Length
- Weight
- Line Count
- If your element identifies a structure that is used in multiple places within the project, you can easily apply a "places" multiplier at the element level. All items within the element are automatically multiplied by the specified value. For example, if you have 12 identical columns, you can create an element called "Column" with a multiplier of 12.
- Use Customize Line Entry > Elements to hide elements if you do not want to use them. Refer to Customize Line Entry Window.
- If elements are not hidden, the system automatically inserts the first element.
Use the Elements dropdown at the top of the screen to perform various tasks related to elements.
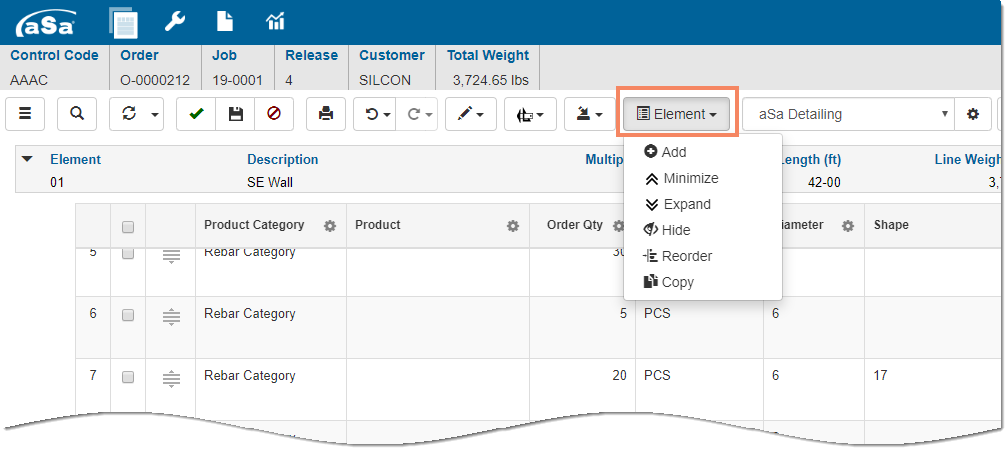
Adding an Element
To add an element to your order:
- Click Element > Add.
A new element header displays at the bottom of the grid.
Click on and complete the element fields:
- Element - Identifier for the element (up to 20 characters)
- Description - Description up to 50 characters.
- Multiplier - If desired, enter a quantity. All items in the element will be multiplied by the specified quantity.
- Click Finish
 .
.
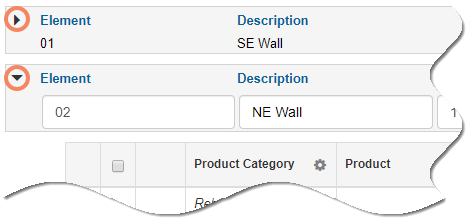
Element View Options
Expanding an element shows all the lines it contains. Minimizing or collapsing an element hides the line detail and shows only the element header.
To minimize or maximize a single element:
- In the grid, click the Expand/Collapse button on the element header. Click the button again to switch between expanded and minimized views.
To minimize (collapse) all elements in the grid:
- At the top of the screen, click Element > Minimize.
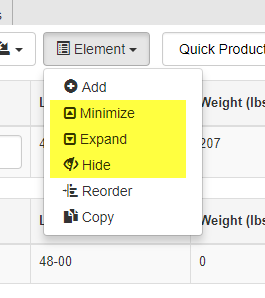
To expand all elements in the grid:
- At the top of the screen, click Element > Expand.
To hide all elements in the grid:
- At the top of the screen, click Element > Hide.
To re-display hidden elements:
- At the top of the screen, click Element > Show.
Reordering Elements
You can easily change the sequence of elements in your order. When you reorder elements, all included lines stay with their parent element.
To re-sequence elements:
- Click Element > Reorder.
The Reorder Elements window displays.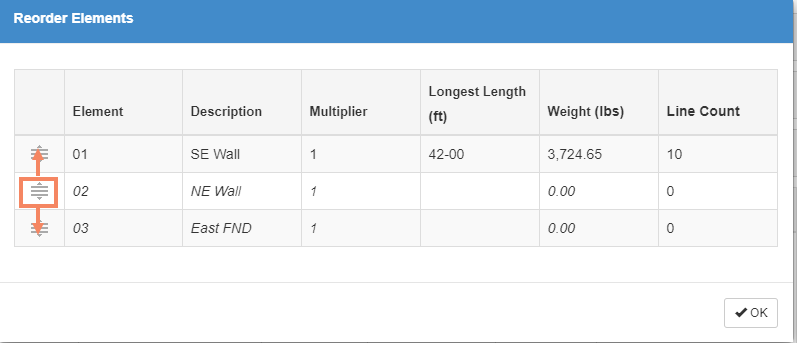
- Click and drag the sequence button(s) to set the desired order.
- Click OK.
Deleting an Element
To delete an element:
- Click Delete on the element row.

The element header and all takeoff lines in the element are removed.
Creating a BTO Kit
In addition to grouping material, elements are also used to create BTO (build to order) kits. Refer to BTO Kits in the Appendix for complete instructions.
To add a BTO kit to an order:
- Create a new element or click on the header of a blank element.
- In the Right pane, click the dropdown and select BTO Kit.
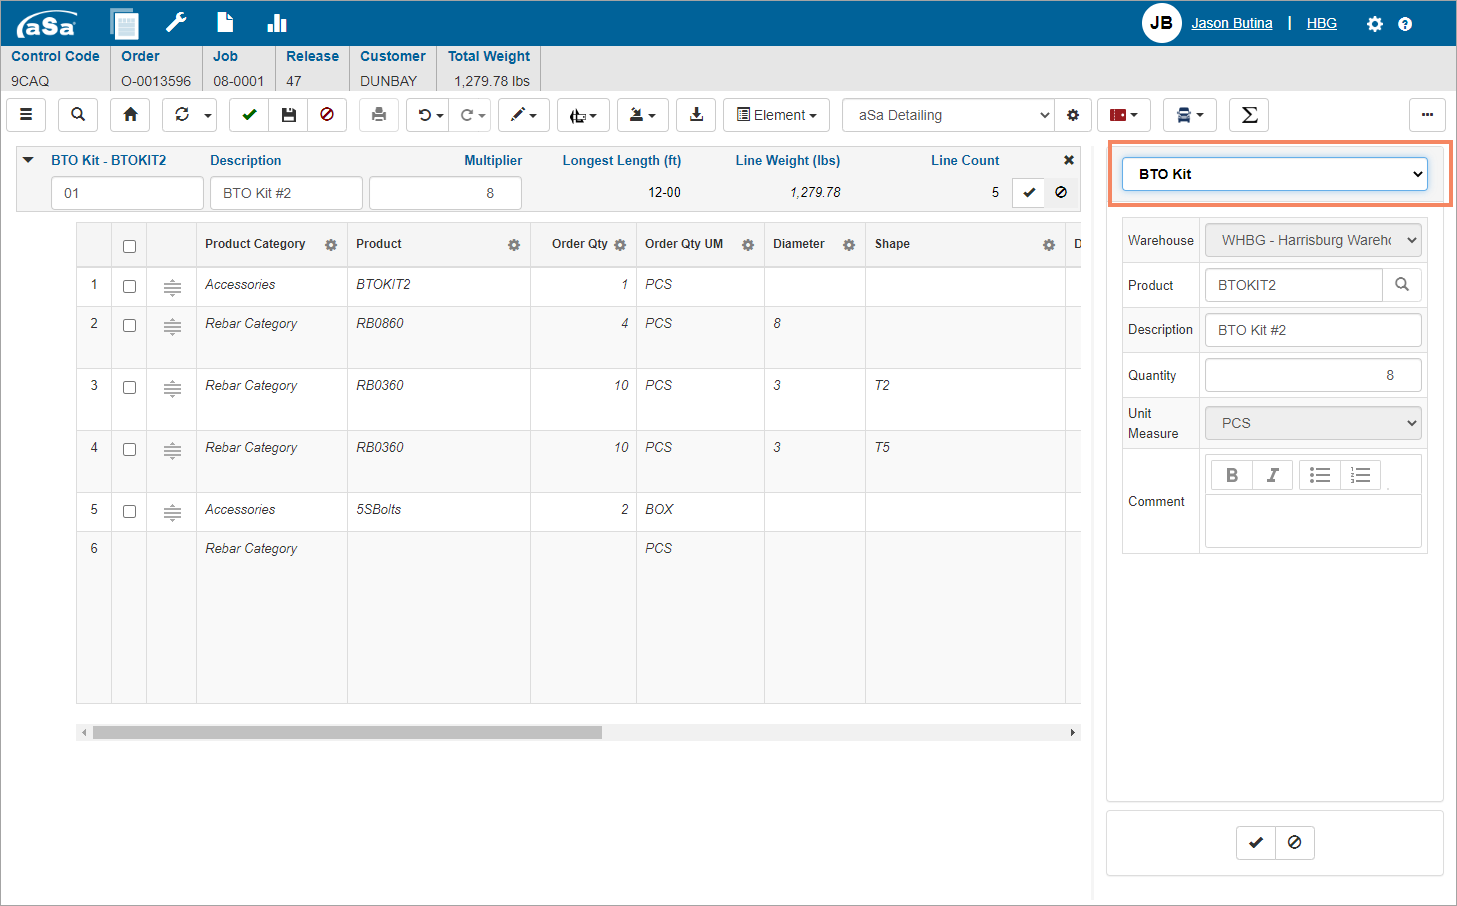
- In the Product field, select the BTO kit product that you defined.
- In the Quantity field, enter the number of kits to assemble.
- Click Finish
 to save the BTO entry.
 - If desired, change the Description on the element header.
In the grid:
- The first row under the BTO header is the kit product.
- If your product definition included components, the component items display.
- Add new items and/or edit existing items to “build” the kit.
All line items under the element header are considered part of the BTO kit.