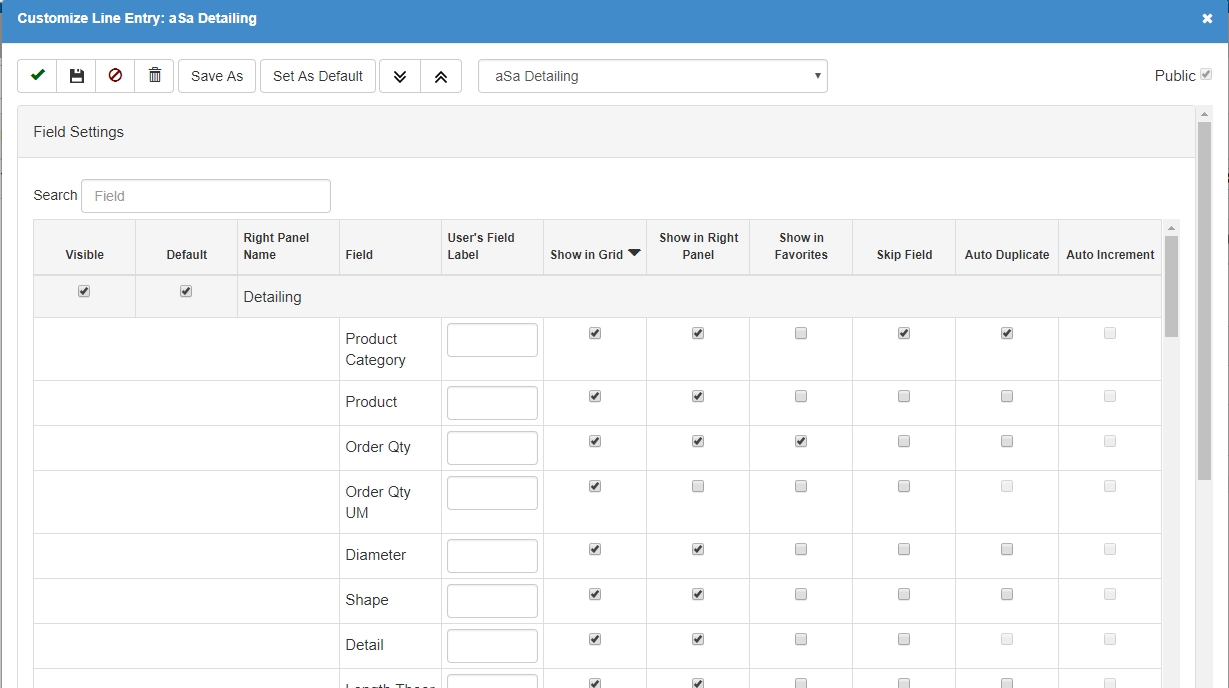
Customize Line Entry Window
Use the Customize Line Entry window to set up Line Entry field options based on your needs and preferences.
Toolbar Buttons
![]() Finish
Finish
Save the current setting and clear all data from the screen.
![]() Save
Save
Save the current setting. The screen remains open, and data remains on the screen.
![]() Cancel
Cancel
Cancel any changes; revert to the last saved version of the setting.
![]() Delete
Delete
Delete the current setting.
Save As
Save the current setting with a new name.
Set as Default
Set the current setting as your default; the one that displays when you open the Line Entry screen in the future.
![]() Expand All Panels
Expand All Panels
Expand all panels to display fields for each panel.
![]() Collapse All Panels
Collapse All Panels
Collapse all open panels; display the panel title bar.
Setting Dropdown
The current setting displays. Click and select the setting that you want to change.
Public
Check to make the current setting available to other users in the system. Uncheck to indicate a personal setting; available to the logged in user only.
Field Settings
Search
Type a search term and press Enter to search for a specific field.
Field Settings Grid
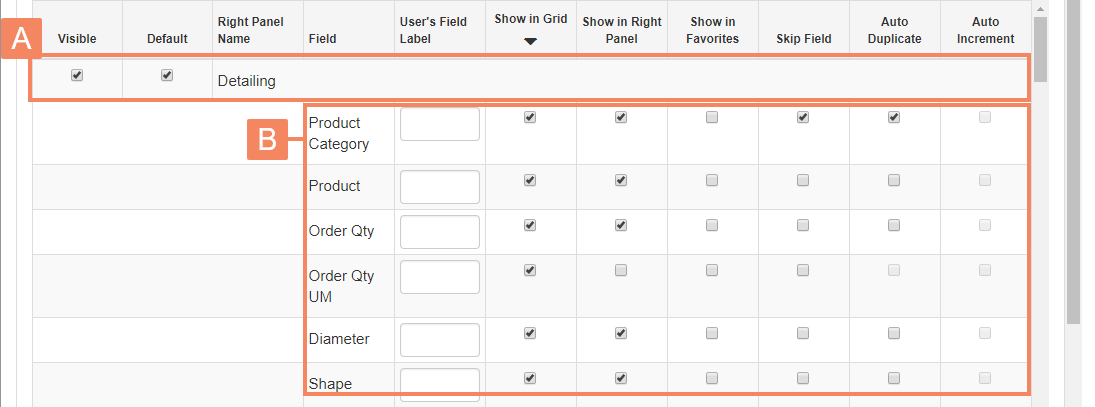
_A_ Field Settings Grid - Right Panel Field Group Options
For each Right Panel Field Group, specify the following.
Visible
Check to include the Field Group in the Right Panel dropdown; uncheck to hide the group.
Default
Check to set the current Field Group as the default — the one that displays when you first enter the screen.
_B_ Field Settings Grid - Field Options
For each field, specify the following.
User's Field Label
If desired, enter a different name for the field that will display in the Entry Grid and Right Panel. For example, if you always use the Reference field to enter a special code that your customer requires for each order, you could change the field label to be "Customer Order Code."
Show in Grid
Check to include the field in the Entry Grid.
Show in Right Panel
Check to include the field in the Right Panel.
Show in Favorites
Check to include the field in the "Favorites" field group. Recommended: Include the Right Panel fields you use most often in the Favorites group.
Skip Field
Check to have the cursor skip over the field when you progress through fields using Tab or Enter. Uncheck to have the cursor stop in the field. (You can always click to return to a skipped field.)
Auto Duplicate
Check if you want to automatically populate the field with the entry from the previous line.
Auto Increment
Check if you want to automatically populate the field with the next sequential value based on the previous field. Auto Increment is only valid for certain fields, such as Bar Mark, Plan, and Section.
For additional information, refer to Understanding Duplicate and Increment Actions.
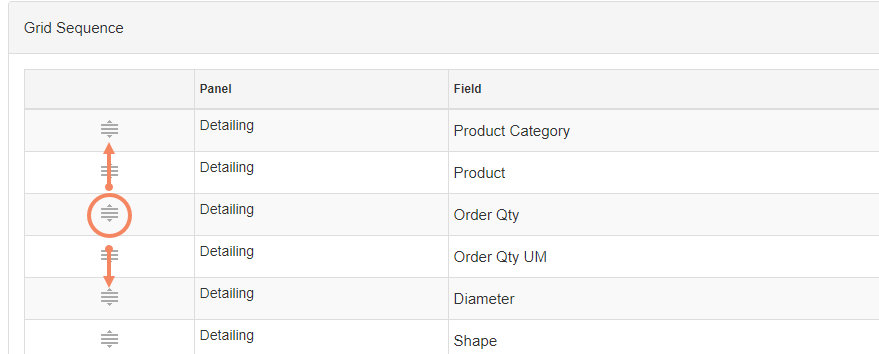
Grid Sequence
Use Grid Sequence to set the order of fields that display in the Entry Grid. All fields marked Show in Grid in the Field Settings panel display in the list.
To set the sequence of grid fields:
- Simply click the Sequence
 icon for the desired field and drag to the desired position.
Element
Elements are used to group line items on an order. For additional information, refer to Working with Elements.
Default Element Action
Select how you want elements to appear when you open the Line Entry screen:
- Expand - All elements expanded to show the included line items.
- Collapse - All elements collapsed. Click the Element header to expand and view the included line items.
- Hide - Elements do not appear on the Line Entry screen.
Options
Auto Save Lines
Specify the number of lines after which the program will automatically save the order. For example, 10 indicates that the order will automatically saved when every tenth line is entered. A lower number ensures limited data loss but may affect performance.
Default Page on Open
Select the page you want to display when you open the Order Entry module. Typically, you would set this to Main (for setting up or opening orders) or Line Entry (for entering details).
Skip Checkmark
Check to automatically save entry lines when the last required field is completed. When unchecked, you must manually click Finish (or tab until Finish has focus and press Enter) to complete each line.
Show Right Menu
Check to display the Right Panel Menu when you open the Line Entry Screen. Uncheck to hide the Right Panel Menu until you manually open it.
Shape Display Option
Select the way you want shape and shape dimensions to display on the Line Entry screen after you save a line with a bent item:
- Unscaled without dimensions
- Scaled without dimensions
- Unscaled with dimensions
Default Rebar Category Type on Load
The first field you must complete on each line item is Product Category. The category determines which fields are valid for the line item. Check to automatically populate the Product Category field with "Rebar Category" when you first open the Line Entry screen. Uncheck to leave the Product Category field blank when the screen opens.
Note: After you begin entering lines, Product Category automatically populates based on your previous entry.