Defining a Stock Kit
Defining a stock kit creates the product definition.
To define a stock kit:
- From the Product module, select Product > Main.
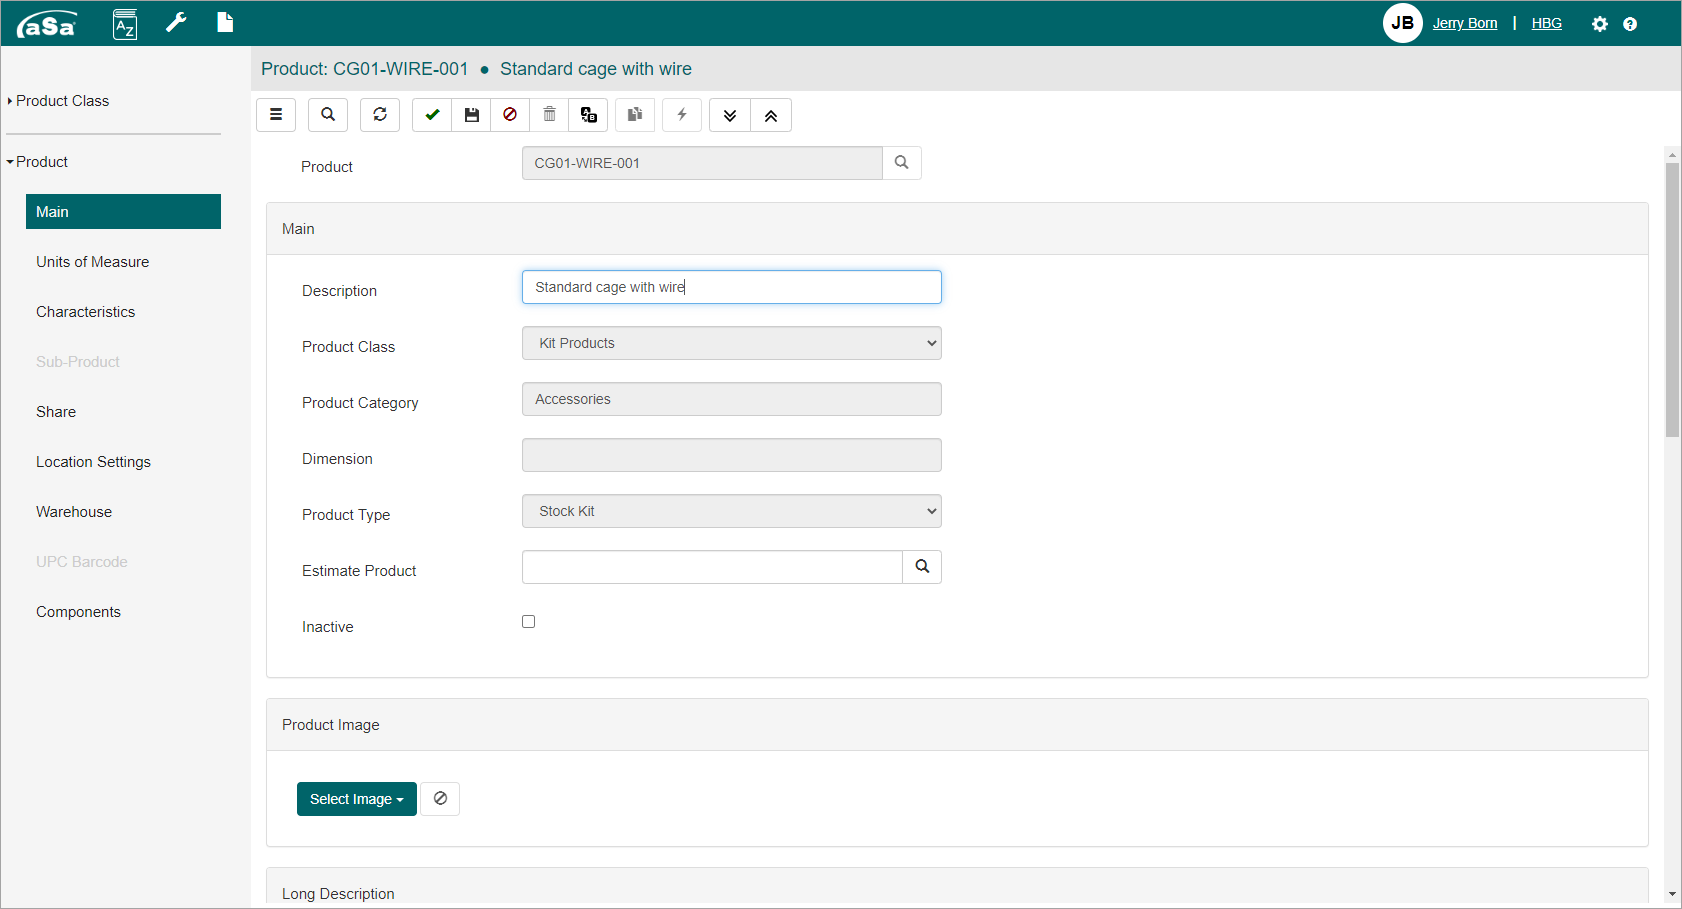
- Enter the Product ID and Description.
- In Product Class, select the product class that you set up to use for assembly items.
Many defaults will populate based on the product class. - Set Product Type to Stock Kit.
- As needed, use the Main, Units of Measure, Characteristics, Share, and Location Settings to set up additional information for the product.
- Use the Warehouse tab to indicate which warehouses in your system may assemble and supply the product.
Note: Be sure to check the Preferred Warehouse for each location.
Because you selected the Product Type Stock Kit, the Components screen is enabled. - Click Components.
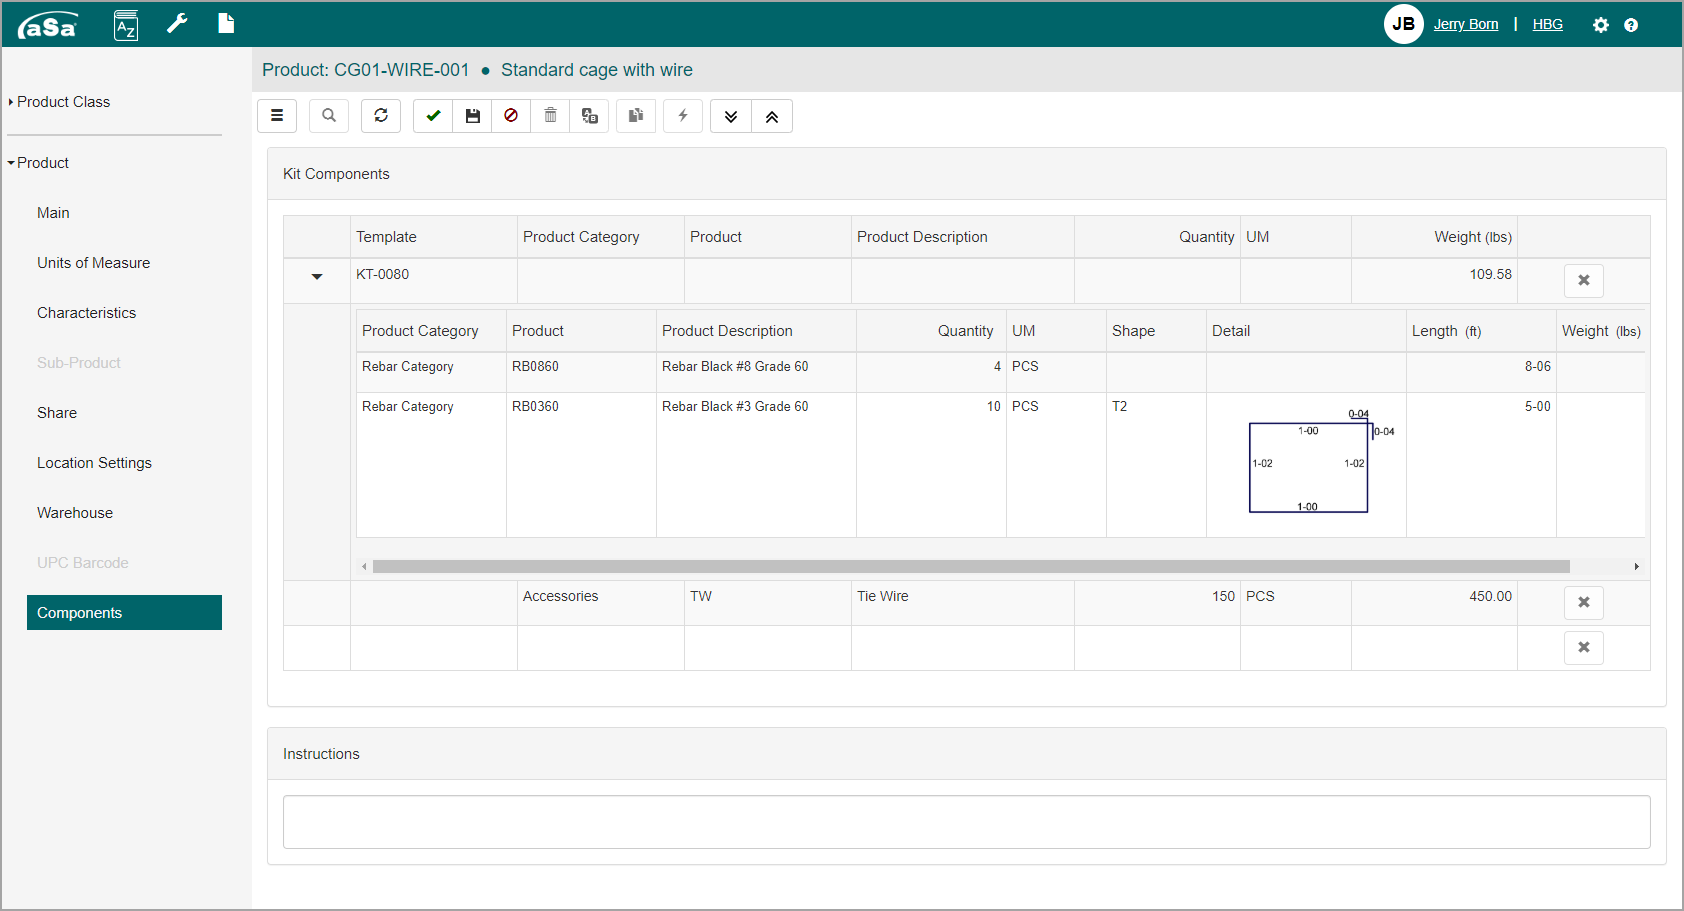
- In the Components grid, select the products that make up the assembly:
- If the component is a finished good, such as sheet of mesh, hard hat, or tie wire, use the Product field to select the product. Enter the quantity required for the kit.
- If the component is fabricated material, such as the bars of a reinforcing cage, select the Template that contains the fabricated items. Refer to Working with Kit Templates.
- Click Finish
 .
.