Importing and Exporting Jobs
In this topic:
Importing Jobs
- Open Import: On the Job or Order Entry screen, click Tools
 . On the Left Menu, select Import > Job.
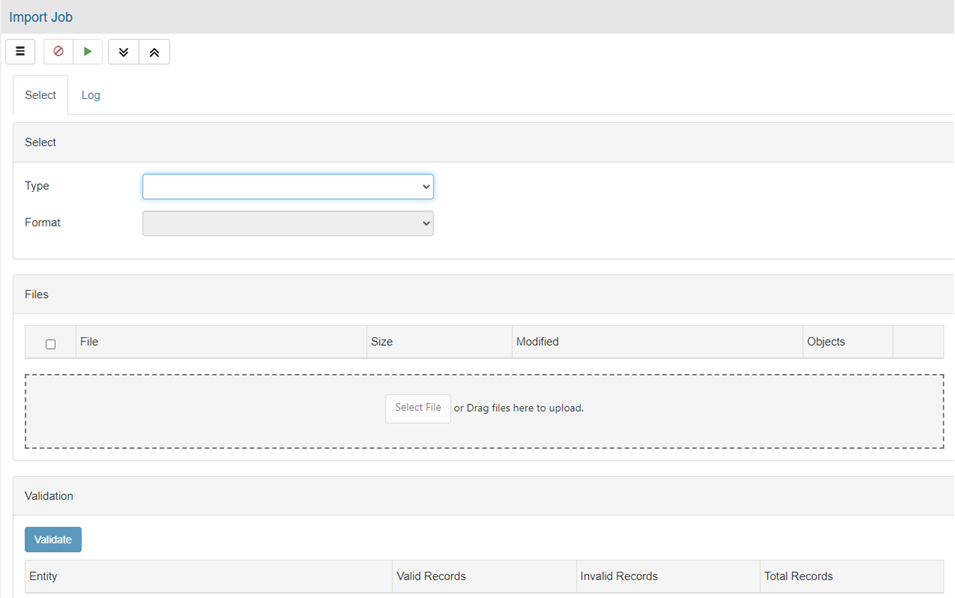
Import Jobs displays.
- Complete the Select Fields:
- Type - Select the type of data to import.
- Format - Select the file format for the file to import.
- Click Select File, then browse to the desired file.
or
Drag and drop files onto the Files box. - Click Validate.
The system validates the file and displays any errors or problems with the import.
Review and resolve any errors based on your needs. - Click Proceed
 .
.
The file(s) import into your system.
Exporting Jobs
- Open Export: On the Job or Order Entry screen, click Tools
 . On the Left Menu, select Export > Job.
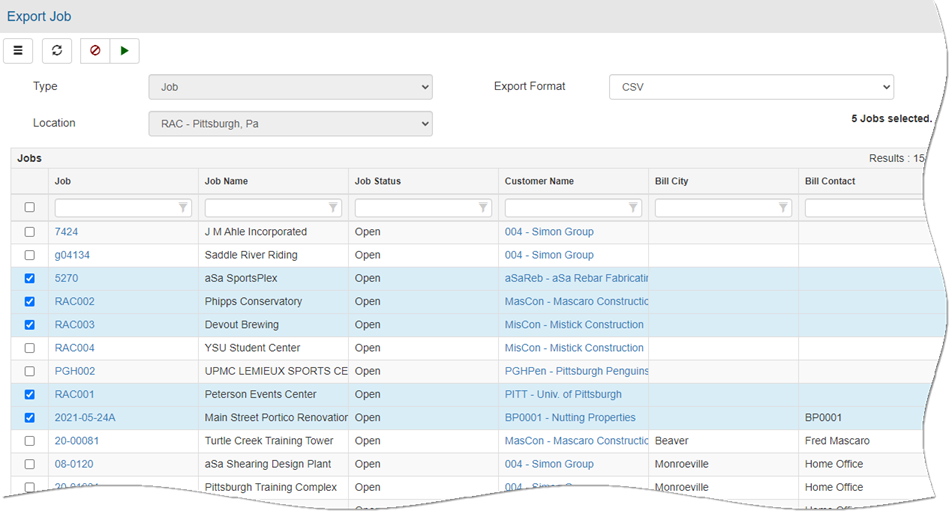
The aSa Export screen displays.
- Complete the header fields:
- Type - Select the type of data to export.
- Export Format - Select the file format of the file to create.
- Location - Select the location to export from.
- In the selection grid, check to select the data that you want to export.
You may sort or filter grid data. Refer to Working with Grids.
- Click Proceed
 .
.
Depending on your browser, the file(s) may be automatically saved to your Downloads folder or you may be prompted to select a destination folder for the file(s).
- At the Confirm prompt, click OK.
- If desired, attach the export file(s) to an e-mail and send it to a fabricator or other destination.
