Using the Column Settings Screen
Use the Column Settings screen to customize grid data based on your needs and preferences.
HINTS:
- Most of the customizations described below can also be applied using grid controls. Refer to Customizing the Grid Using Grid Controls.
- After customizing the grid, save and re-use your displays settings. Refer to Using the Column Settings Screen.
To customize grid data using the Column Settings screen:
- Click Settings
 next to any column name, then select the Column Settings.
The Display Settings screen displays.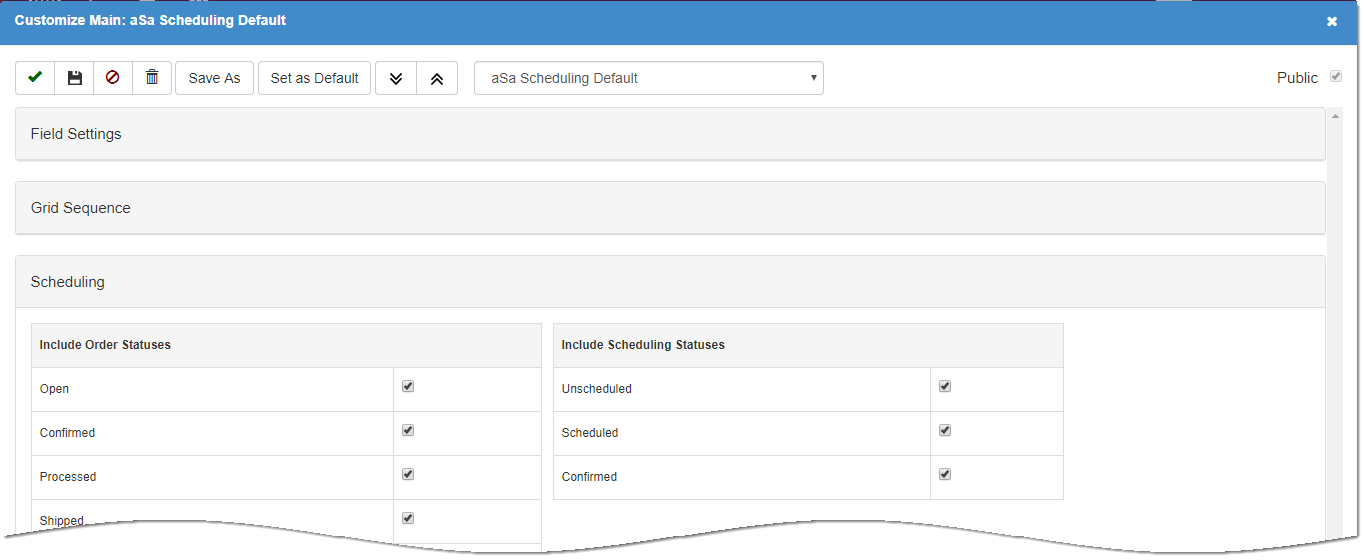
- Use the Field Settings, Grid Sequence, and Scheduling panels to manipulate grid data as described below.
- Based on your needs, save the setting scheme:
- To simply save changes to the current setting, click Save
 .
. - To save the setting with a new name, click Save As and enter a Target name.
- To save the setting as your default, click Set as Default.
Refer to Saving and Re-Using Display Settings for additional information about working with saved schemes.
- Click Finish
 to close the screen and apply display settings to the grid.
Field Settings
Search
Optionally, enter a field name to quickly filter the grid and display the desired field.
Field Setting Grid
For each row in the grid, complete the following based on your needs:
- User's Field Label - Enter a new for the column header.
- Show in Grid - Check to show the column in the grid. Uncheck to hide.
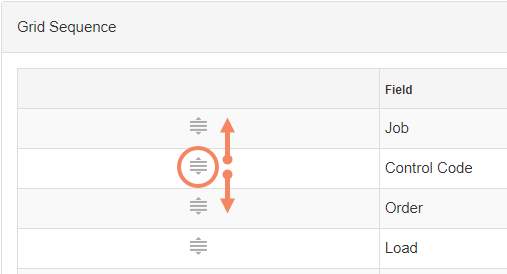
Grid Sequence
Re-arrange grid columns based on your needs.
- Click the
 icon for the column to move, then drag to the desired position.
Scheduling
Include Order Statuses
Check to include orders of the corresponding selected order status. Uncheck to exclude.
Example: Uncheck Shipped to hide orders that have already shipped.
Include Scheduling Statuses
Check to include orders of a corresponding scheduling status. Uncheck to exclude.
Example: Uncheck Scheduled to hide orders that have already been scheduled.
Include Fabrication Locations
In a multi-location environment, you may want to schedule across multiple locations or work with one location at a time. Check to include a location. Uncheck to exclude it.